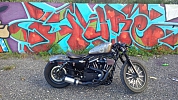
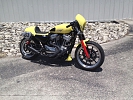
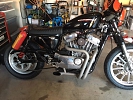
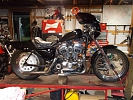
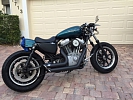
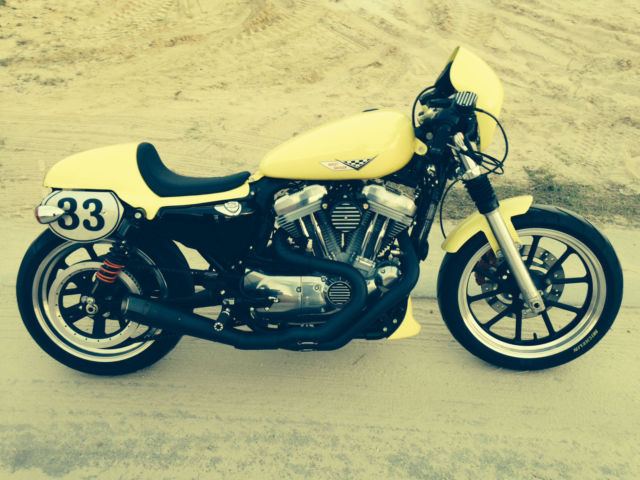
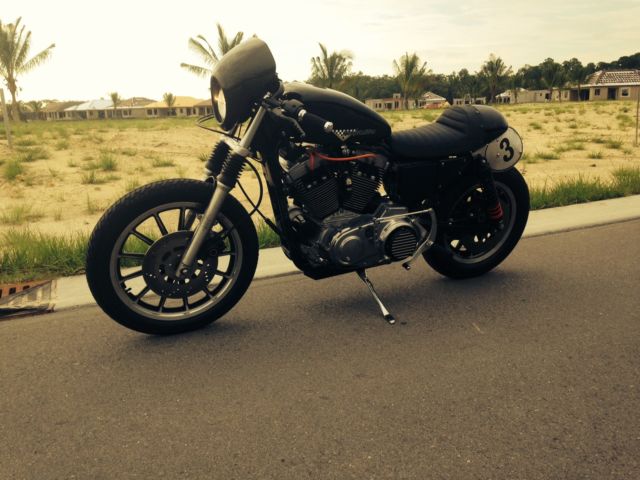
2011 883 Sportster. XLH Low Vivid Cafe Racer
2011 Harley-Davidson Other
| Price: | US $6,000.00 |
| Item location: | Bonita Springs, Florida, United States |
| Make: | Harley-Davidson |
| Model: | Other |
| SubModel: | 2011 883 sportster Low |
| Type: | Sport Bike |
| Year: | 2011 |
| Mileage: | 3,880 |
| Color: | Yellow |
| Engine size: | 883 |
| Vehicle Title: | Clear |
| Contact seller: | Contact form |
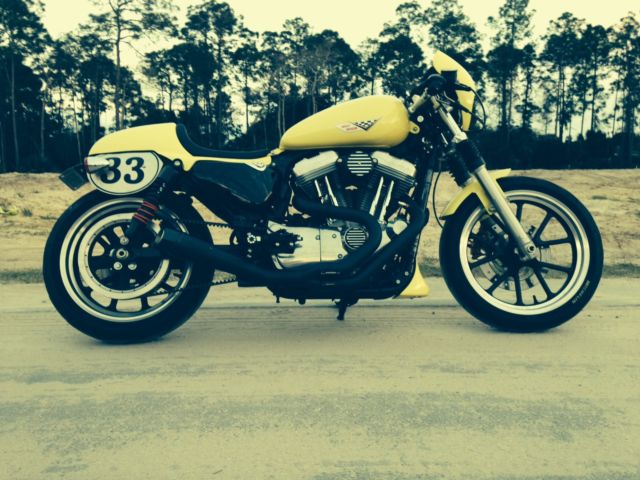
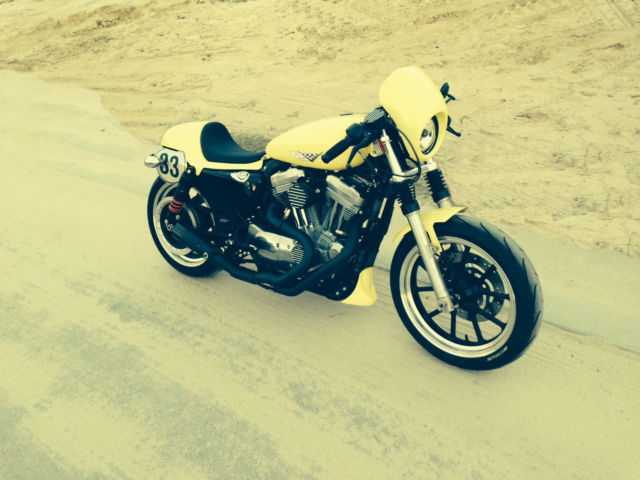
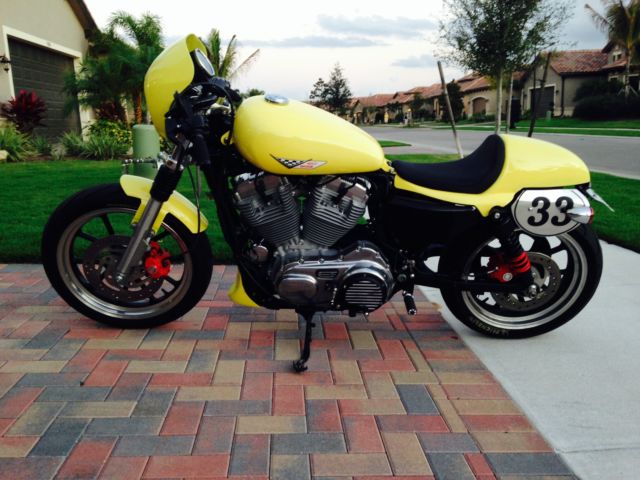
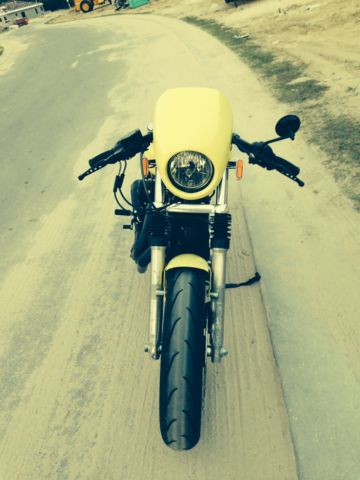
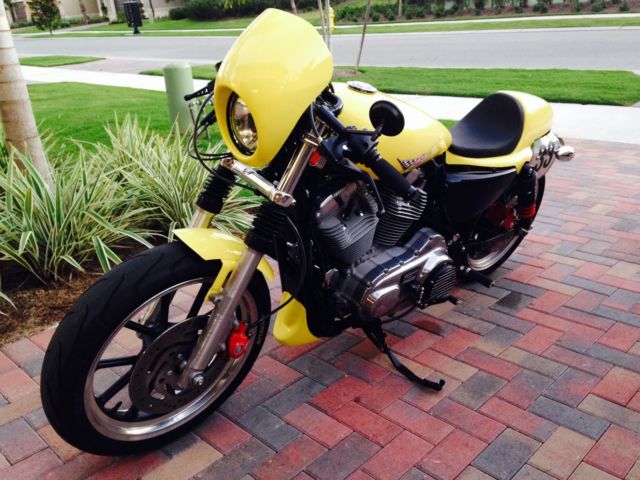
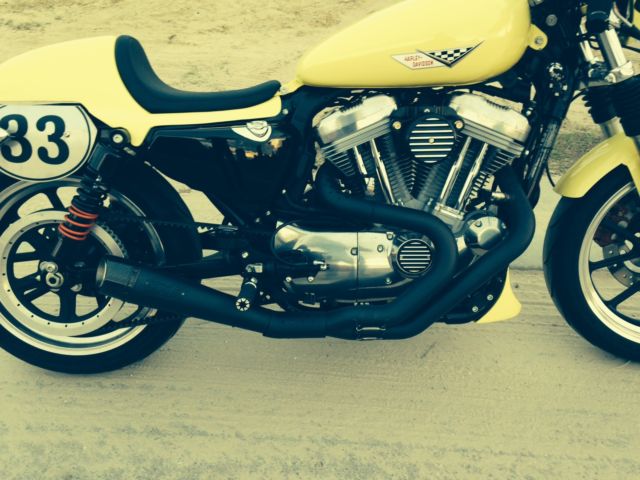
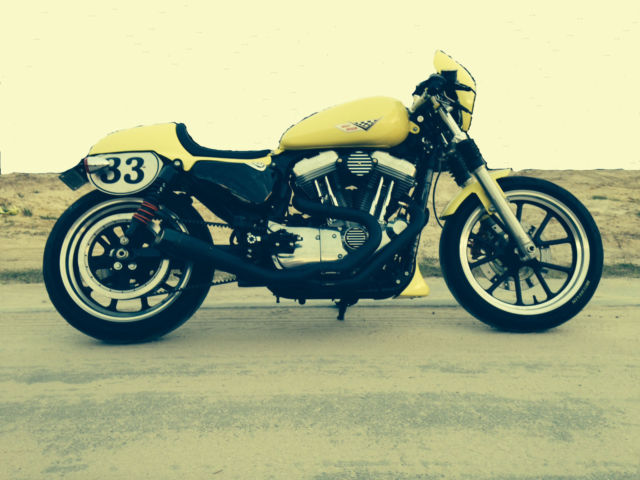
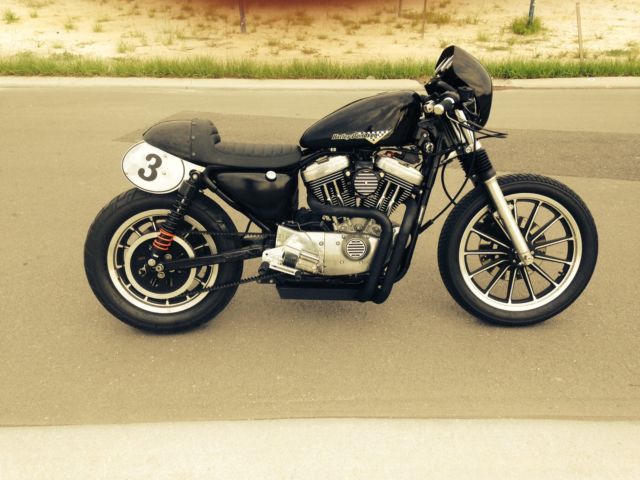
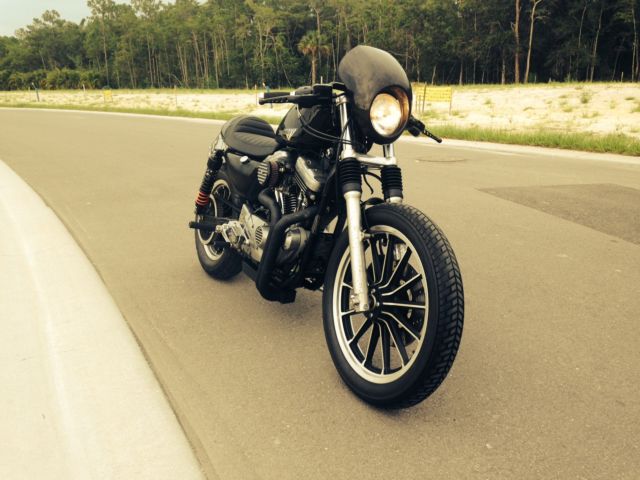
You will NOT see yourself coming or going on this Cafe style racer. This is built with all new and finest parts. It started out as a 2011 883 XLH low. It has 3. 00 miles on it and does not leak. cough or spit. Guaranteed to get looks as if you were on a 50k custom. Contact me for more pics or info. An earlier build which sold promptly is shown as the black Cafe racer. Don't miss out on this. Really. The basis for this build is a 2011 Sportster 883cc XLH. Low. I picked it up for $5. 00. 00 at an HD dealer. All checked out and ready to fly. It had 3. 00 miles on the odometer. The RYCA kit is $2. 00. 00 so add that to the chosen Sporty and you have a general price tag on the starting point for the entire project. This Sporty is special to begin with. It's the only model w/ an 17 inch rear tire rim (18 inch front). This is important for the cafe racer stance. I found that there was approximately another $3. 00. 00 for odds and ends. This brings the total to $10. 00. NOT including labor. So doing the math you can see that you're getting a hell of a deal. and I'm taking the beating! As far as engine work. it was minimal Other than the exhaust and the Joker Machine air cleaner. the engine is factory stock. Because of the freer breathing engine (a combination of both the new air cleaner and the exhaust system). I did have to add a Cobra auto Tuner to the ECM for the different A/F ratio. The exhaust pipes are made by Vance and Hines and designed by V&H and Roland Sands Design (RSD). The fairing is made by Harley Davidson. and can accommodate the two factory gauges (speedo and tach). The instrument itself was $350. 00. It icludes a digital speedo. an analog tach. a bar graph fuel gauge and a transmission gear indicator. The gators or pleated fork boots are from J&P cycles. The forks have a Progressive 2 inch lowering kit installed. The fork brace / front fender is custom made. The handlebars are Clubman style made by Burley. The five hole levers are from J&P also. The contrast cut brake cylinder cover and the rest of the similar contrast cut pieces (derby cover. inspection cover and timer cover) are all made by Landmark Machine. This is a theme used in addition to the caf? racer for aesthetics only. The gas tank is factory and just re-sprayed VW yellow (originally white). A race theme gas cap is used also. The decal is aftermarket which ties in the race look because the checkered flag goes well with the number plates in the far rear. The shifter controls and the brake controls are billet pieces made by Chainsikle. They flip everything backwards. but the shifting pattern is still one down. four up. The brake cylinder is turned around 180* so that the plunger enters from the rear. The pegs are knurled pieces made by HD. They are currently the shortest pegs available. The brake lines are made by Magnum. and are a black flexible stainless steel. The seat is made by Roland Sands Design (RSD) and integrates the fiberglass boat tail and the vinyl seat together. It's gel coated and ready to paint. The seat itself is made by Mustang. This is the smooth style. It�s also available in a diamond pleated style. The rear shocks are Progressive 421�s and offer great stable handling out back . The rear brake light is made by RYCA. It's an LED unit that incorporates the running light. brake light and directionals. It's held in place with a two part epoxy. At this time all lights are working including the rear directional which are dual purposed (Brakes and directionals) The stainless steel number plates were mailed flat for space conservation. Getting them to conform with the contours of the caf? seat was perhaps the most difficult part of the whole conversion. You had to gently roll them on a towel covered edge of a workbench. This had to be accomplished be gently bending them at TWO different axes. Once the desired shape was attained. they were screwed in place. Then the decals were applied. Lastly the whole bike was cleaned and buffed. (If you had the patience and could wait to ride!)
Also published at eBay.com
|
|
2011 Harley Davidson Sportster Cafe Racer |
US $9,000.00
|
|
|
2011 Harley-Davidson Sportster Cafe Racer - One of a Kind! |
US $3,050.00
|
|
|
2011 Harley Davidson Super Low 883 Cafe Racer Sportster |
US $1,525.00
|
|
|
HARLEY DAVIDSON 2011 SPORTSTER XL 883R 1200R ROADSTER CAFE RACER SCREAMIN ... |
£5,000.00
|
|
|
Harley XG750 vivid black cafe racer in like new condition. |
US $7,000.00
|
|
|
2002 Harley-Davidson Sportster XL883, XL1200, Sportster, Cafe Racer, Custo ... |
US $17,999.00
|
|
|
Sportster Cafe Racer |
US $4,501.00
|
|
|
Sportster 883 Cafe Racer |
US $3,400.00
|
|
|
Cafe Racer/Sportster |
US $1,500.00
|
|
|
Harley Sportster / Cafe Racer |
US $2,500.00
|